
This is a query from the Android community. Some of you may be experiencing the same thing, facing the problem of low storage or slow speed while accessing your device. It is even after the fact that manufacturers are already loading up their gadgets with a high amount of storage specifications.
Unfortunately, Android doesn’t have any automatic trash management feature to deal up with junk files. Therefore, Android users need to take some extra effort to remove empty trash. In this article, we'll teach you how to empty the junk files and how to recover deleted files from trash on Android phone.
Do Android Phones Have A Trash Folder Where to Find Android Trash Folder?
Actually, there is no specific location on Android devices like Mac and Windows, where all the junk can be collected. This is because smartphones are designed with limited storage, it's impossible to maintain a dedicated folder for the deleted trash. Instead, there are dedicated folders of almost every app that you have installed on your gadget. So, you need to find an Android trash folder location of each app (like Photos) one by one that contains recently deleted files available there.
How to Access Trash on Android and Recover Deleted Files from Android Trash?
Now to free up space by deleting the unwanted files of each app, you need to find the location of the junk files for each of them. Below is the stepwise approach for three commonly used apps for you to get some help in understanding the technique better.
2.1 Google Photos
In the case of Android devices, Google Photos is the default app to handle or manage your saved pictures. Hence, if you want to clear some deleted photos from your device, then you need to check its trash folder. It can be done as follows:
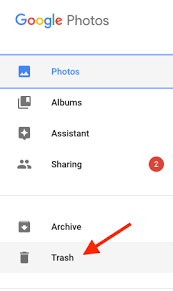
Open Google Photos app, tap the hamburger icon located on top to visit its options.
You can find the ‘Trash” folder in the list, open it to access the deleted pictures.
Choose all or select some pics from there that you want to delete permanently and tap on delete or trash icon to get your job done.
2.2 Gmail
Another common app that probably all of the mobile users use to send or receive emails, that is Gmail. The truth is that you might get lots of unwanted emails that you regularly delete.
But, it is only for a temporary basis and still there in your device for the next 30 days. So, if you want to release some of your Gmail app storage space, then you need to empty its trash folder. Here are the steps to do it:
Open the Gmail app, tap on the hamburger icon on the top left corner.
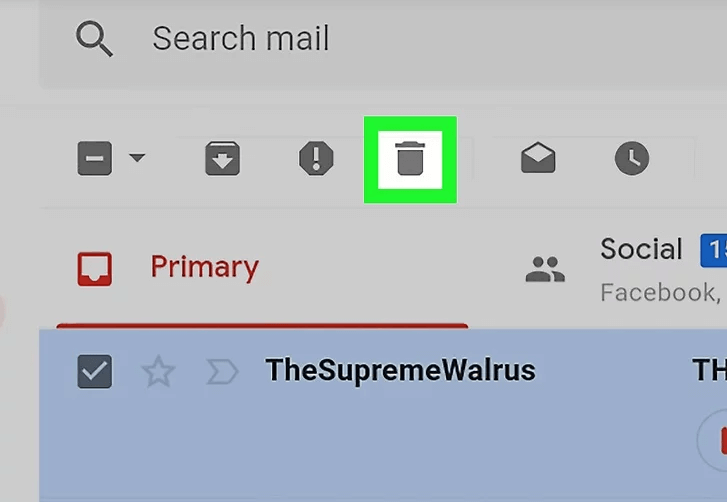
You will get a list of different folders and categories based on Gmail. Click on ‘Trash’.
Now you are all set to choose the emails showing there, next click on the delete icon from the toolbar.
If you do not need any email in the trash, then select all together and click on the ‘Empty Trash Now’ button available there. It can help you to remove every junk mail from there.
2.3 Dropbox
Dropbox, a free cloud-based app helping you save files online and manage them from anywhere. It allows only 2 GB of space as per its free version, so we suggest you to clear it once in a while.
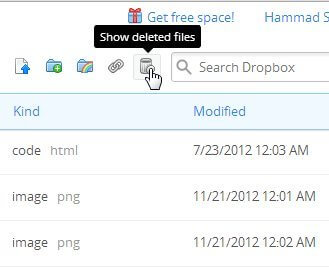
Launch the Dropbox app and click on the ‘Trash’ icon located above in the list of the toolbox.
A list of all the related deleted files will be shown there. All you need to do is select the files and click again on the delete button.
It will ask for your final confirmation about the deletion and will take some time to empty it, depending on the size of the files there.
How to Recover Deleted Files from Trash on Android after Accidentally Deleting?
D-Back Android
While managing your storage, chances are that you delete some important data unintentionally. In this case, you can utilize a reliable Android recovery tool D-Back for the Android recovery app. It is an essential third-party application for every Android user to deal with lost data.
1,000,000 Downloads
You can recover deleted data from trash on Android.
It helps to recover deleted files from trash on Android .
You can preview and filter the lost or deleted files that you need after the scan.
D-Back data recovery app works with both un-rooted and rooted Android devices that run on Android OS 2.0 to 9.0.
The app is 100% safe and can also work even if the backups are not available.
Follow only a few steps to get back the deleted files from Trash on Android:
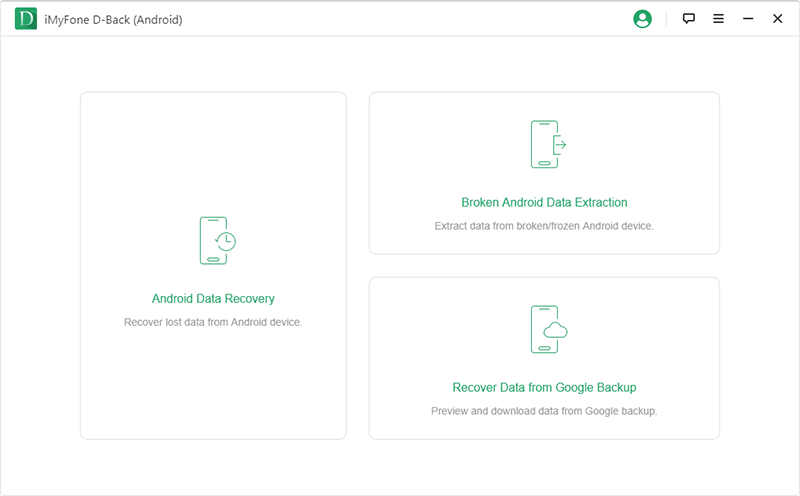
Step 1. Install and launch the D-Back for Android app on your PC, select a recovery mode according to your requirements.
Step 2. In the next screen, choose your device name and device model from the provided menus.

Step 3. The software will download the data package automatically.

Step 4. After that, connect your device to the computer using a USB cable.

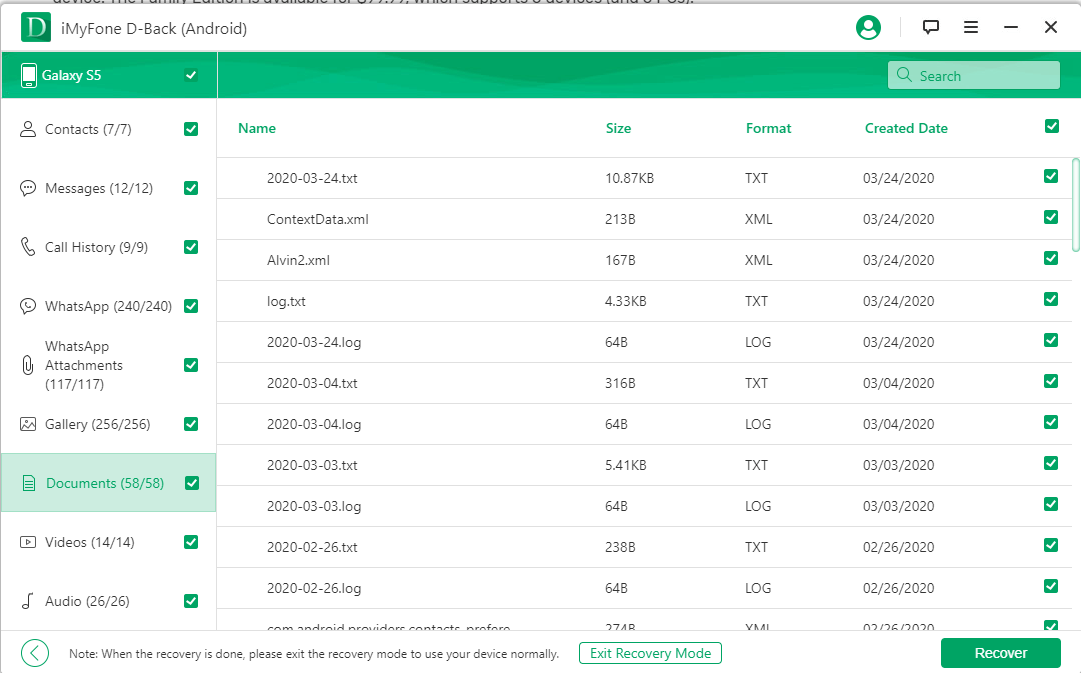
Step 5. Select the file type from the provided menus. For recovering deleted files from trash on Android, select “Documents” and press “Next”.

Step 6. The scanning result will be displayed on the screen. Select the files which need to be recovered and press “Recover”.
How to Empty Trash/Junk Files on Android to Increase Storage Space?
Till now, you might have cleaned the unwanted files and has got much free space on your smartphone. If you still need to remove more junk files to free up more space and improve phone performance, try the following ways.
Way 1. Clear cached data
All the existing apps on your Android device needs some space in the OS as well to store their intermediate data. It is known as a cache that they can use anytime to enhance their customized experience and run faster. So if the performance of an app doesn’t bother you much, then it is recommended to clear the cache after every regular interval. There are two ways:
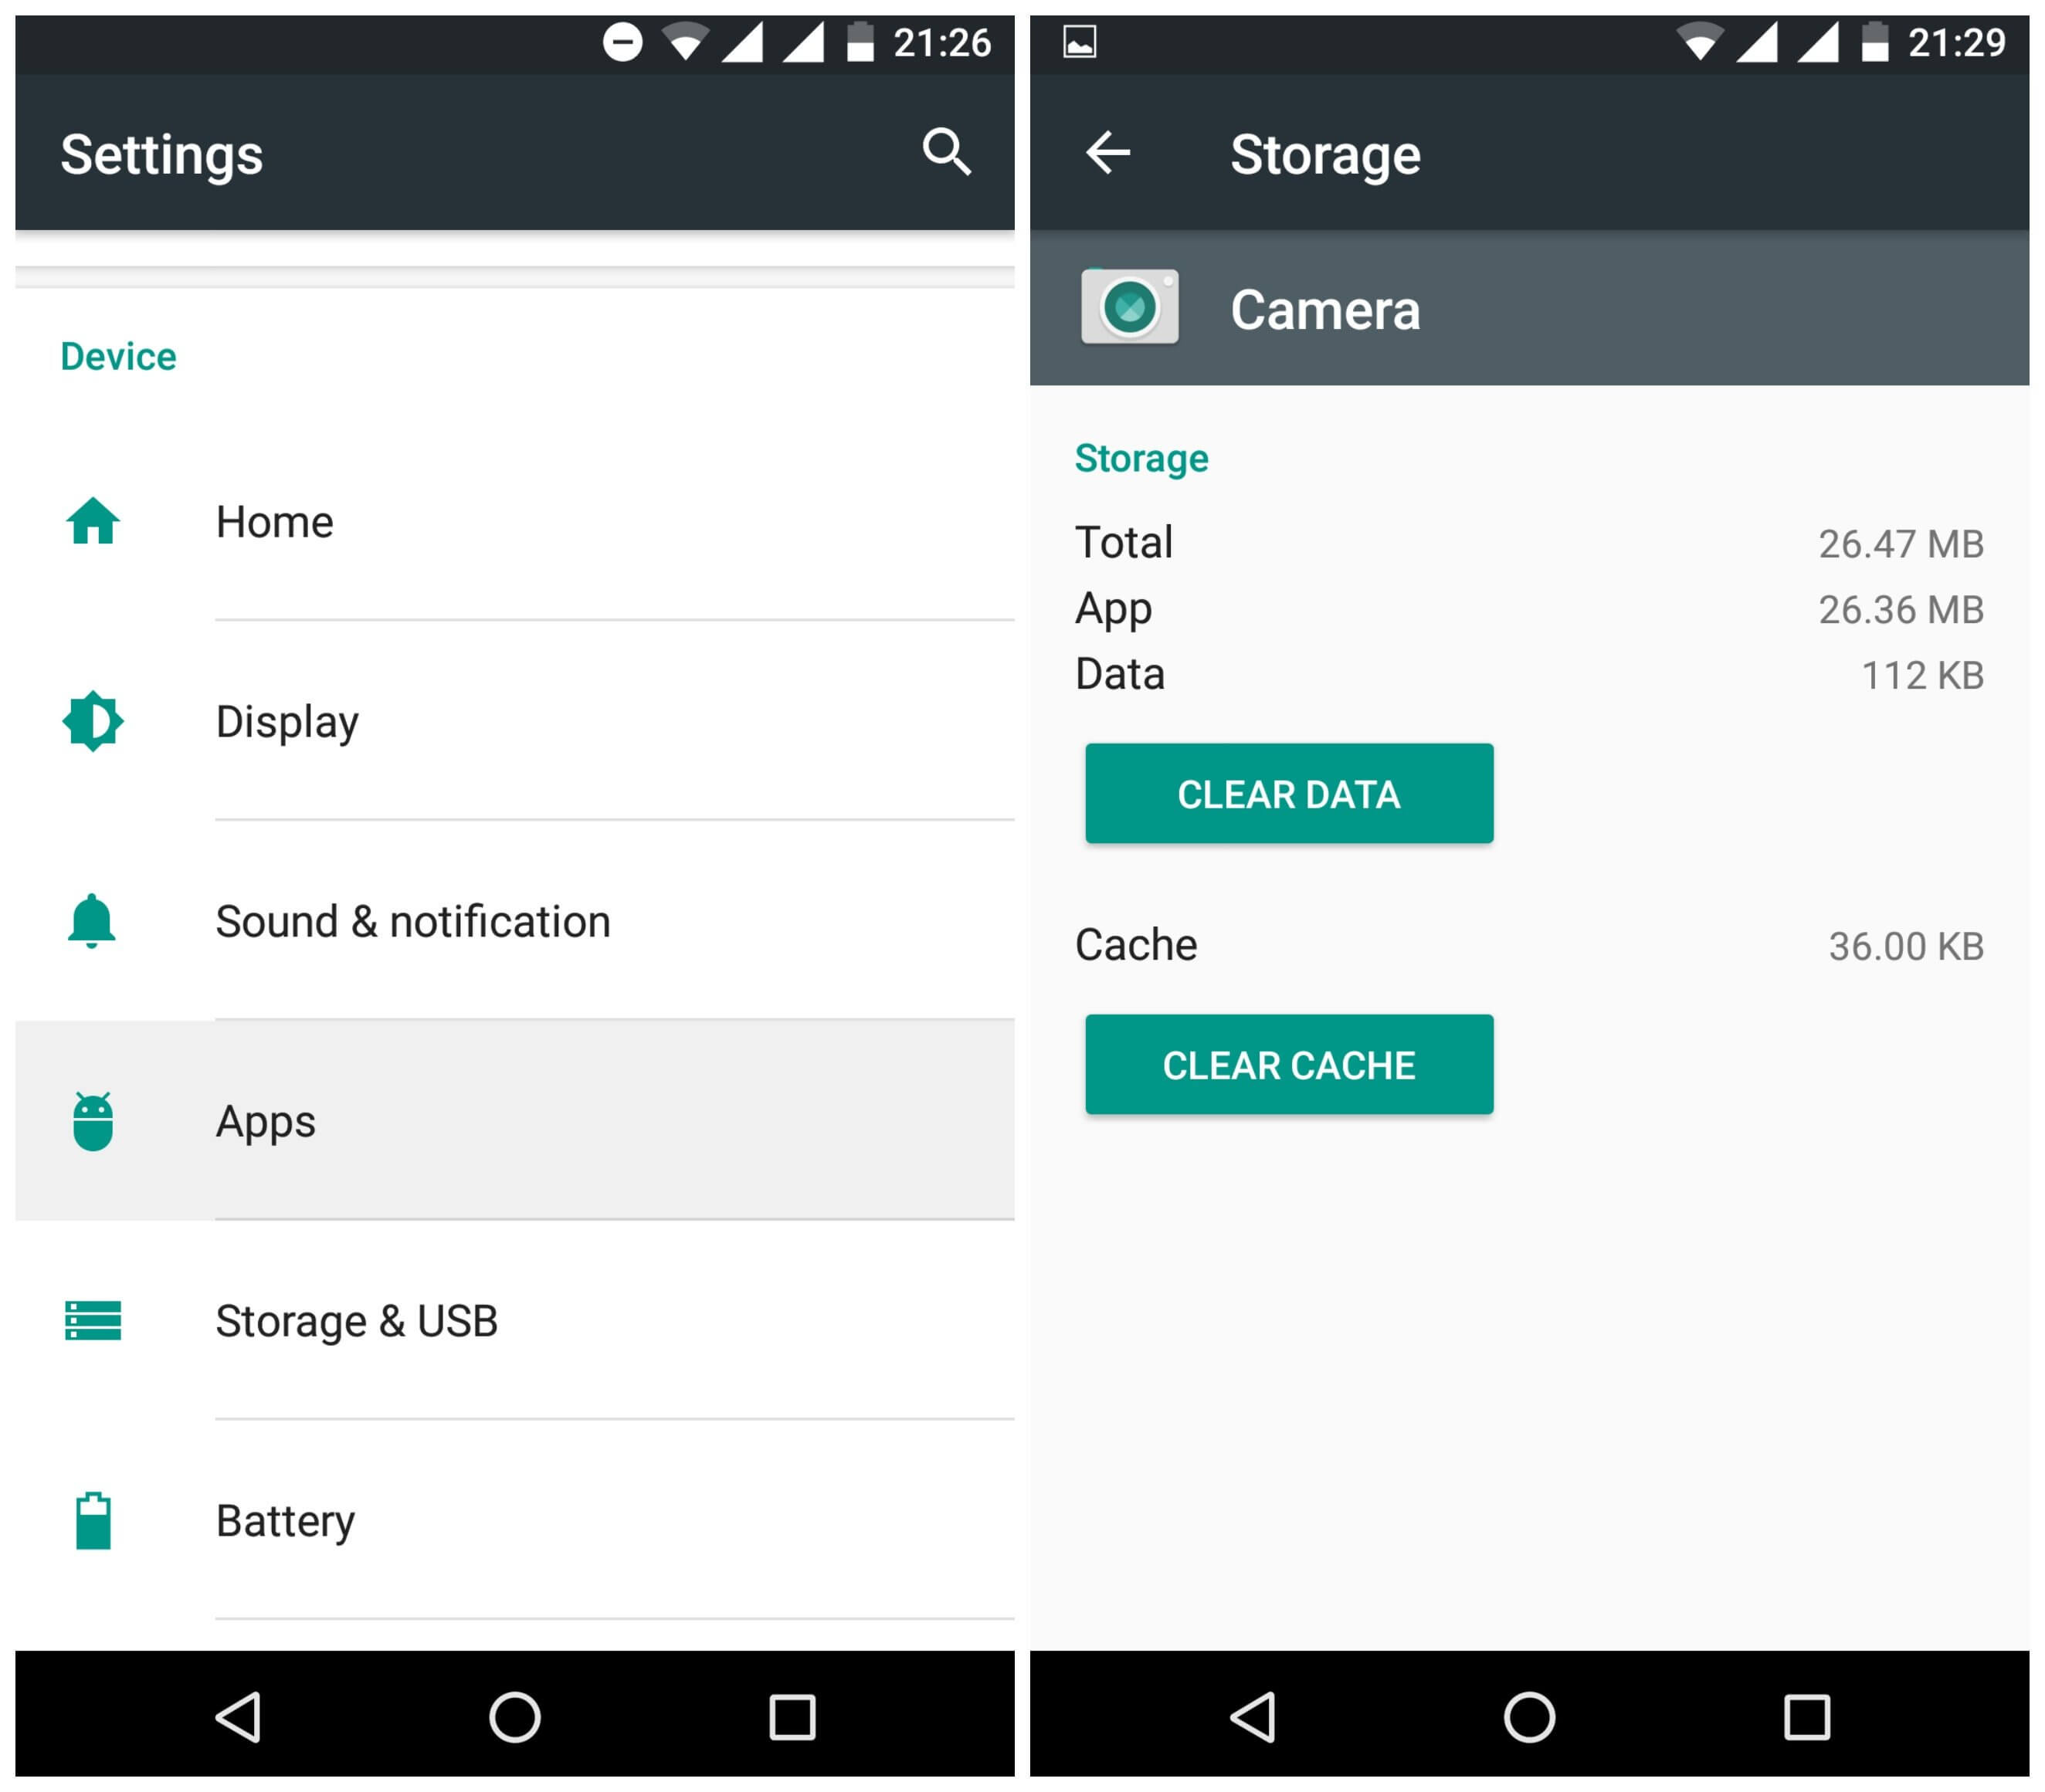
Clearing cache of a specific app - Go to Apps, and you will get the list of apps, click on the app for which you have to clear the cache data and check its storage setting. You are all set to remove cache data from there.
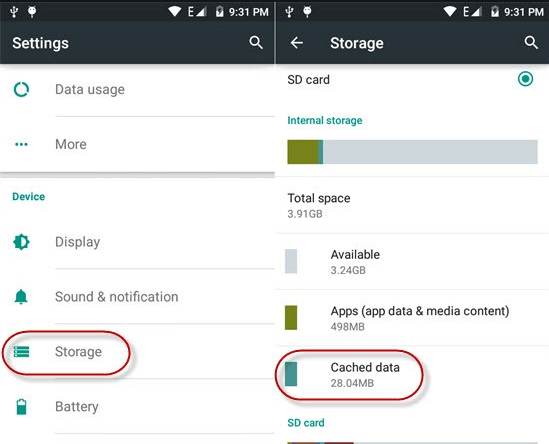
Clearing the entire cache – In case that you do not want to compromise with storing the unwanted data of any app anywhere in your device, you can clear the cache of all the apps in one shot with ease. To do it, go to the storage settings on your device and tap on the cache data option, confirm to clear cache data by tapping on "OK".
Way 2. Delete downloaded files
There may be many unwanted files downloaded in your system from the web. So, it is best to locate the Downloads folder in your device or check the Download history. You can also use the File manager to check your downloaded content.
Way 3. Uninstall unused apps
Sometimes you may install some apps just for trail or one-time purpose but forget to uninstall them later. And, no need to explain the fact that an installed app takes a lot of space on your device.
So you should spend some time to self-audit your list of installed apps. Hence, by this, you can come to know and remove the unnecessary ones. You can go to the Apps section under the Settings, where you can select and uninstall any app of your choice.
Way 4. Delete duplicate photos
Your gallery is also a potential place that might include duplicate files. You can manually visit your gallery to check every picture and delete the unwanted ones. By the way, to save some time in it, you can also install third-party apps like Duplicate File Fixer to help to scan/delete the duplicate content.
Way 5. Use smart storage
Smart Storage is a new feature in Android 8. It is a beneficial option to use if you do not have time to check for duplicate or unwanted data on your device, and that might already be present on the cloud. To activate it, you need to go to the Storage section under the Settings and enable the Smart Storage Manager. After turning on, it always runs in the background and helps you automatically delete unwanted files.
Conclusion
I'm sure this guide will help you answer the question like "How do I find my trash folder on Android?" or "How to empty trash on Android?".
By following the above tricks, you can clear unwanted data of your mobile from the Android Trash Folder location. It is a simple technique to maintain the storage space of your device. Also, it can help you always to recover any vital deleted data.


 October 20, 2022