


 March 30, 2023
FRP is the short of Factory Reset Protection, which is a security feature on Samsung Galaxy J3. You will be grateful for the FPR lock if your Samsung device is lost or stolen. Because FRP lock prevents others from getting access to your Galaxy J3. However, you will face the problem about how to unlcok a Samsung Galaxy J3,
if you factory reset your phone and get stuck at “Verify your account”;
if you buy a second hand Samsung Galaxy J3 with FRP lock on it;
if you want to change the Google account, but don’t remember your Google account credentials.
After a thorough reaseach, we will introduce you 3 useful solutions on removing Google account from Samsung J3.

Method 1. How to Unlock a Samsung Galaxy J3 Google Account by iMyFone LockWiper (Android)
Recommendation:
Ease of use:
Compatibility:
Safety:
iMyFone LockWiper (Android) FRP unlock tool is specifically designed to bypass Google account verification. Meanwhile, it can also remove various screen locks on Samsung devices. The most important thing is that this software is very easy to use. This means anyone without technical knowledge can unlock Samaung Google account just by a few clicks.
![]()
1,000,000+ Downloads
-
Completely remove Google account/FRP lock without password from Galaxy J3.
-
Quickly bypass the Google account and create a new account on your Samsung J3.
-
Your Samsung J3 won’t be tracked by the previous account after removal.
-
Remove all types of screen locks ranging from passcodes, PIN, fingerprints and facial recognition.
You can easily unlock a Samsung J3 with those great features.
iMyfone LockWiper (Android) is also favored by many authoritative media. It is always right to choose the software to unlock Galaxy J3.
With these simple steps below, you can learn how to unlock a Samsung Galaxy J3 Google account with iMyFone LockWiper (Android):
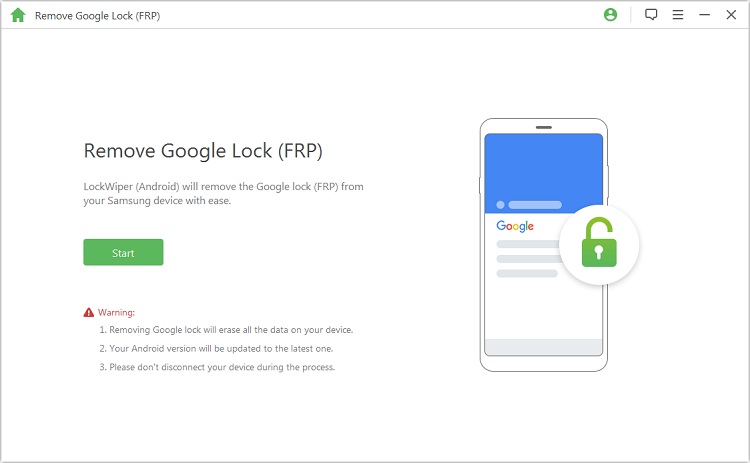
Step 1. Download, launch and install iMyFone Lockwiper (Android) on your PC and choose the “Remove Google Lock (FRP)” mode. Hit “Start” and connect your Samsung J3 to the PC via USB cable.
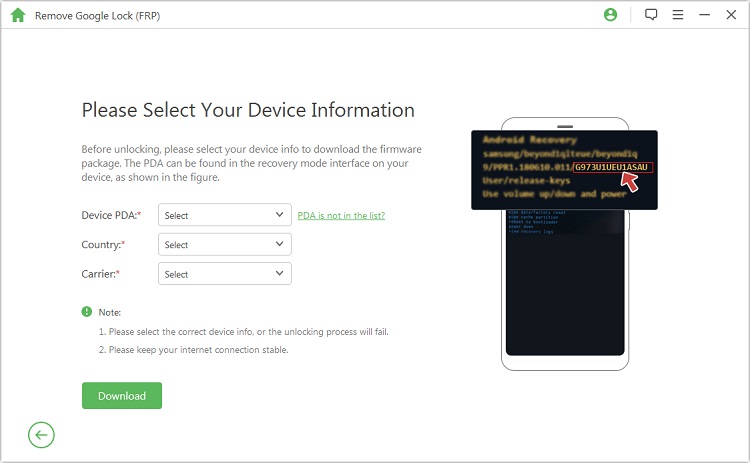
Step 2. Once the device information is detected, click “Next”. Follow the instructions on the screen and select the device PDA, then hit “Download”.
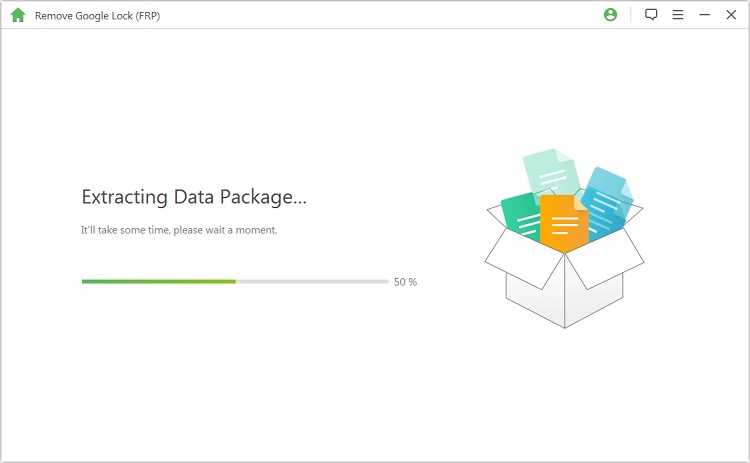
Step 3. Wait for the program to search and download a data package for your device. Once it’s done, click on “Start to Extract”. Then, follow the instructions to enable “USB Debugging” and “OEM unlock”.
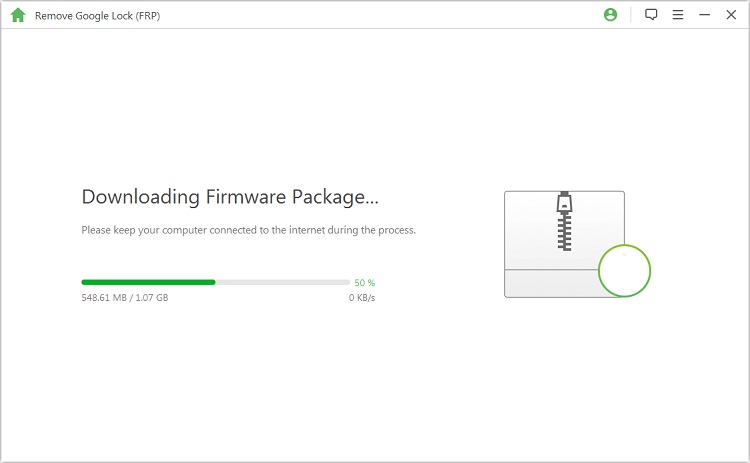
Step 4. Reset your device, then put it into Downloading Mode to download the firmware package. Click “Start to Extract” when it finishes.
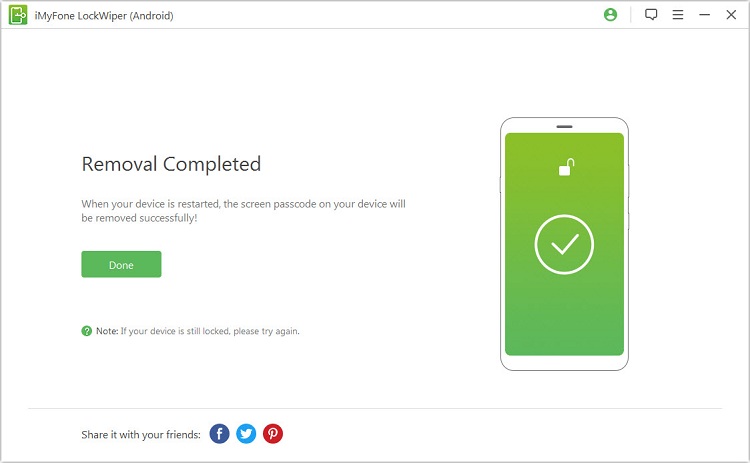
Step 5. Next wait for the software to unlock Google account from on your Galaxy J3. Your device will be unlocked soon.
At the same time, you can also learn how to unlock a Samsung Galaxy J3 Google account/FRP lock from a more detailed guide.
Method 2. How to Unlock a Samsung Galaxy J3 Google Account After Reset
Recommendation:
Ease of use:
Compatibility:
Safety:
This method is fairly common amongst Samsung users. It is often used after performing a factory reset. Because it will come to “Verify your account”. Then you can use this solution to bypass FRP lock on a Samsung Galaxy J3.
Here’s how to unlock a Samsung Galaxy J3 Google account. The method is a little complicated. You should follow the steps carefully.
Step 1. After reset, select language and connect your device to a Wi-Fi.
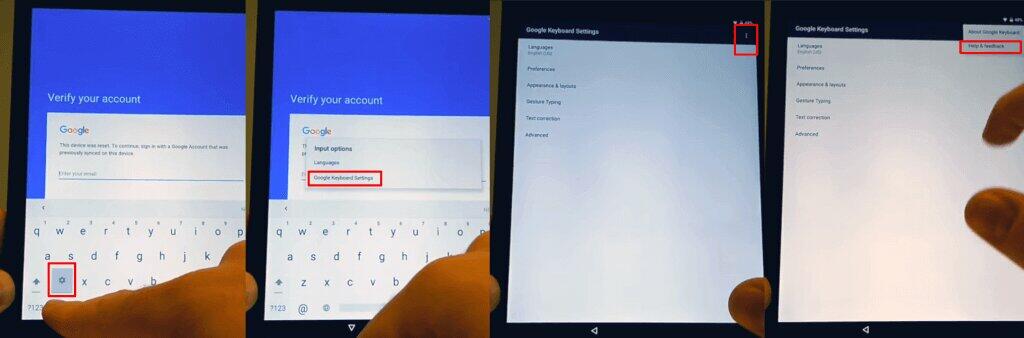
Step 2. Once you’re asked for Google credentials, tap and hold “@” on the virtual keyboard and enter the Settings menu.
Step 3. Go to “Google Keyboard Settings”.
Step 4. Tap on the three dots on the upper right corner, and then select “Help & Feedback”, and choose any item in the list.
Step 5. Tap on “Using Google Keyboard” in the Help section. Then tap and hold to select a text, then choose “Websearch”.
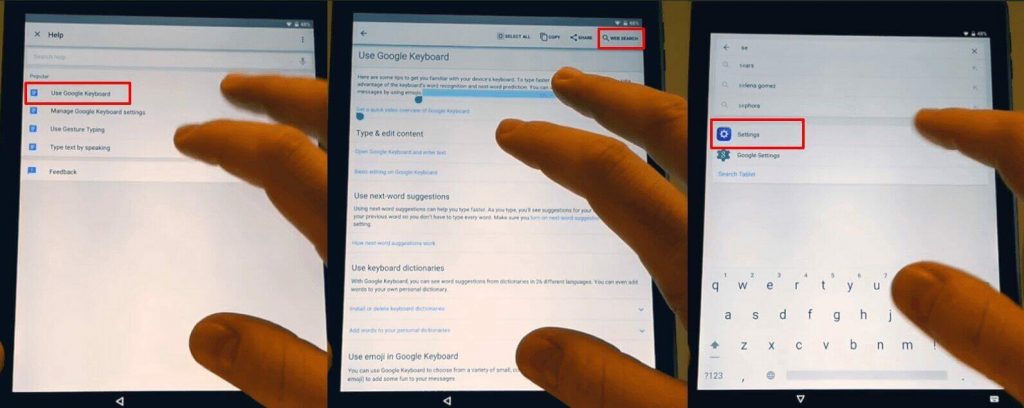
Step 6. Once the page opens, type “Settings” in the search bar. Scroll down, and select “About Phone”.
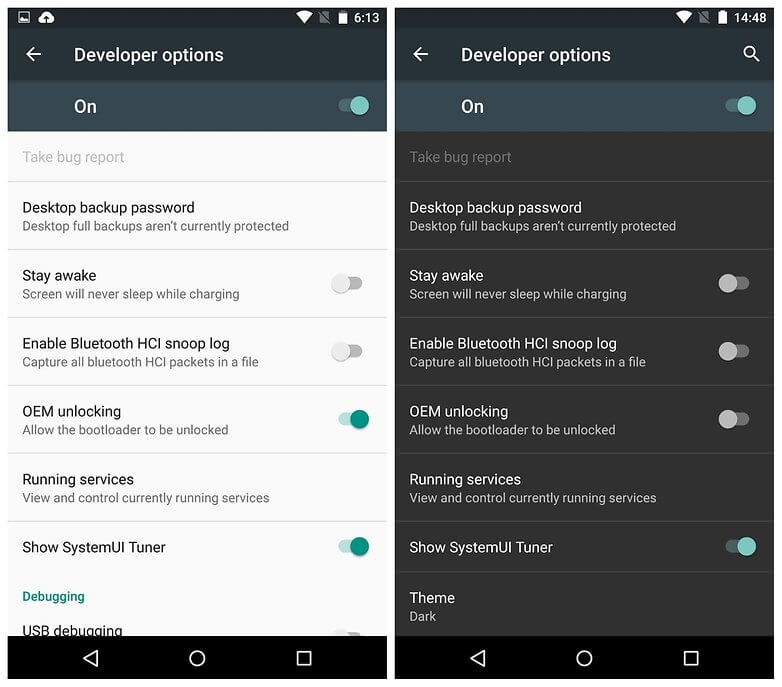
Step 7. Find “Build Number” and tap on it seven (7) times to activate “Developer Options”.
Step 8. Go back to the menu, enter “Developer Option”. And enable “OEM Unlocking” and hit “Back” twice.
Step 9. Restart your device again, and connect to Wi-Fi.
Step 10. You will be asked to add a new Google account. Once you do so, your Samsung J3 will be unlocked.
Method 3. How to Unlock a Samsung Galaxy J3 by FRP Bypass APK
Recommendation:
Ease of use:
Compatibility:
Safety:
The last method we will show you is using FRP bypass APK to remove Google account on a Samsung Galaxy J3. with this method, you don’t need the computer to unlock Samsung J3. And it works on Android 7.0 and below.
However, this method is very tricky, so pay attention to these steps for how to unlock a Samsung Galaxy J3 via FRP bypass APK.
Step 1. Reset your phone, then choose the language and tap on “Start”.
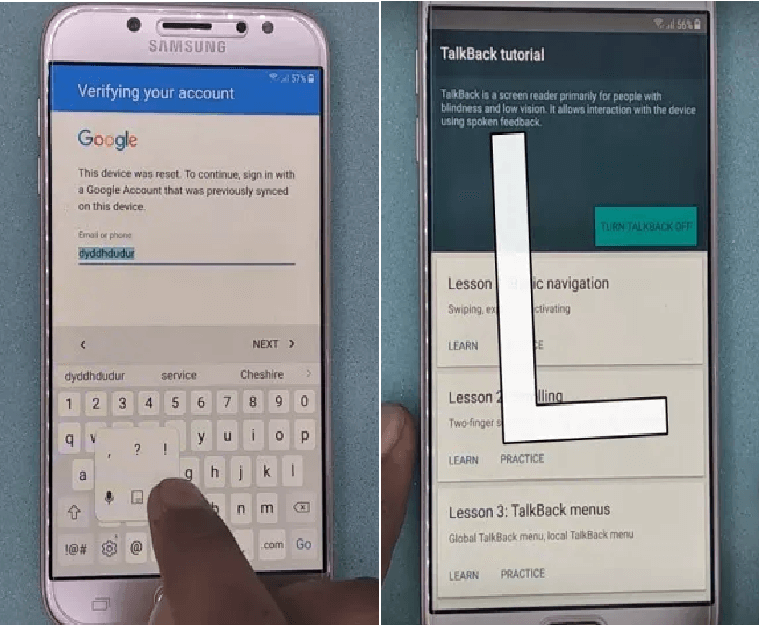
Step 2. Connect to Wi-Fi, and you will be asked for Google account verification.
Step 3. Through the keypad, go to Keyboard settings and select "About Samsung Keyboard", then choose “Open Source License”.
Step 4. Tap and hold on the Agreement Page, select the three dots on the top right corner after a pop-up appears. Choose “Websearch”.
Step 5. Go back to the beginning, then press the Home button three times. When the talkback menu appears, draw an “L” on the screen.
Step 6. When Global Context Menu opens, select “Talkback Settings”.
Step 7. Press both Volume buttons until “Suspend Talkback” opens.
Step 8. Choose “Ok” and then go back to Talkback settings, and choose “Help & Feedback”.
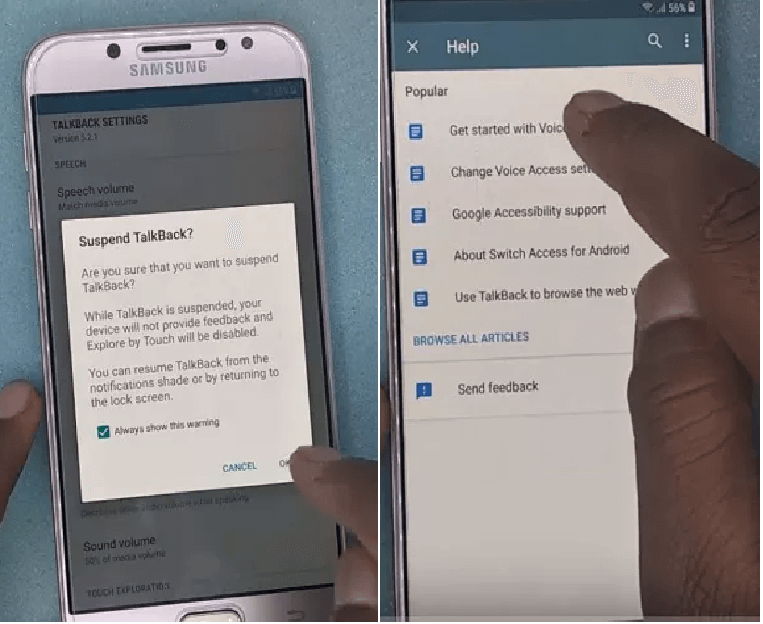
Step 9. Tap and hold “Get started with Voice Access”. Then a video will appear, on that page tap on “Youtube”.
Step 10. Once Youtube is opened, go to “Account” and tap on “Terms and Privacy Policy”.
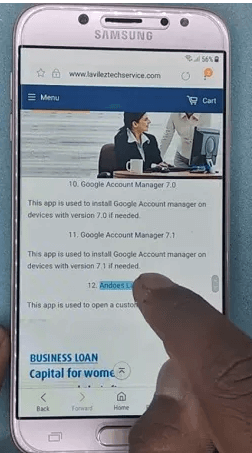
Step 11. Choose “Cancel” on the dialogue box. After you are redirected to the “Terms and Privacy Policy” page, type in “Lavileztechservice”.
Step 12. Go to its download page and block ads. Scroll down and select “Andoes Launcher”. After that, download “anddoes.launcher.apk”, it will be declined.
Step 13. Go to the search bar, type “youthgalaxy.com” and try downloading it.
Step 14. Go to “Bookmarks” and then “History”. Tap on “Download history > Andoes Launcher”.
Step 15. A dialogue box will open, tap on “Settings”. From there, tap on “Unknown Sources” and select “OK” to install the launcher.
Step 16. Once installed, go to the device settings and choose “Lock Screen & Security > Other Security Settings”.
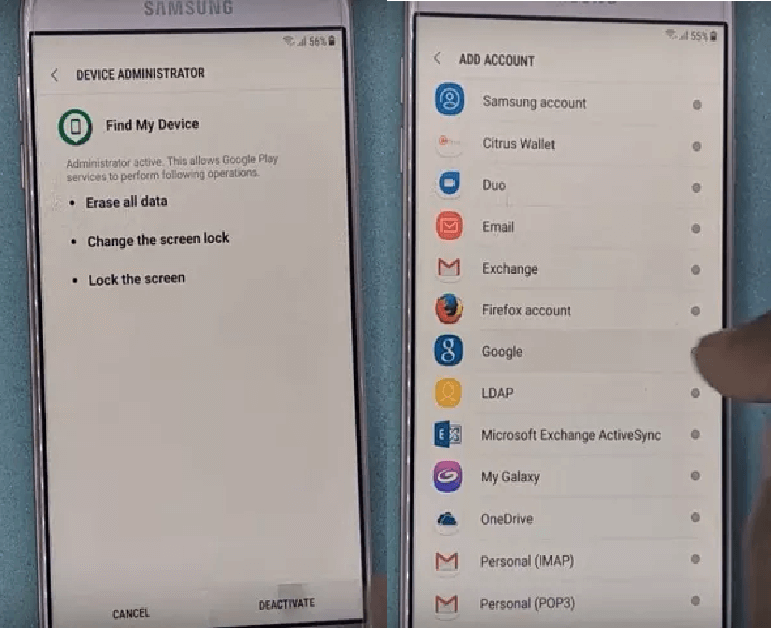
Step 17. Choose “Device Administrators” and uncheck “Find My Device”. Go back to settings and choose “Apps”, ensure that system apps are visible.
Step 18. Choose “Google Account Manager” and disable it. Next disable “Google Play Services”. Go to download history again and tap on “Technocare” to install.
Step 19. Tap on “Done” after installation and go back to Settings. Choose “Clouds and Accounts > Accounts > Add Account > Google”.
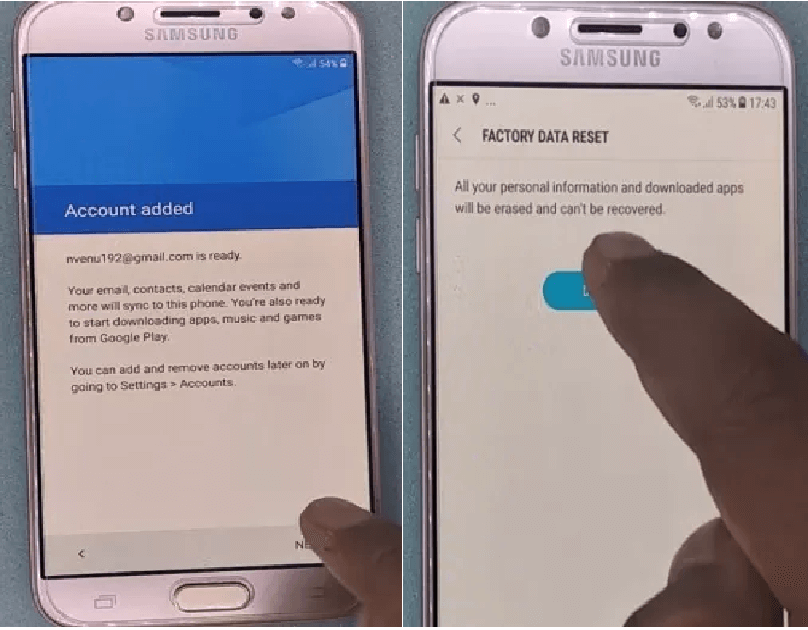
Step 20. The screen will say “Couldn’t Sign it”, hit “Next” and this time it will work, so try it again. Type in your new Google account details.
Step 21. Go back to settings and choose “Other Security Settings > Device Administrators > Android Device Manager”. Then Enable “Google Play Store” from “Apps” in settings.
Step 22. Restart your phone. On the welcome screen, choose “Start” and then “Agree to all”. Choose “Don’t Restore”, then finish the wizard.
Step 23. Go to settings, choose “About Phone > Software Information > Build Number”. Go back to “Developer Options” and choose “Agree”.
Step 24. Activate “USB Debugging” and “OEM Unlock”. Choose “Restart” from “About phone”. Then select “Factory Data Reset > Delete All”.
Step 25. Once the device restarts, choose “Start” and complete the process. You can now continue using your Samsung device.
Conclusion
After reading, you have learned three (3) methods for how to unlock a Samsung Galaxy J3. Two of the methods are not only extremely lengthy but inconvenient and require much technical skills. Only iMyFone LockWiper (Android) provides an easy solution to bypass Google account verification without dissecting each and every setting of your device. It is no doubt that LockWiper (Android) is your best option to bypass FRP lock. Don’t hesitate to download the free trial to unlock your Samsung Galaxy J3.